Canva Editing Made Easy
How to Edit a Canva Template
Canva templates have revolutionized the stationery world. It has never been easier to have such beautiful yet cost-effective designs for business and personal use. As a platform, Canva is very simple and intuitive to use, but hopefully this guide will get you up and running quickly. The first step is to create an account on Canva.
1. Creating your Canva Account
If you do not yet have a Canva account, you will need to create one before uploading your template. If you already have an account, skip to the next page.
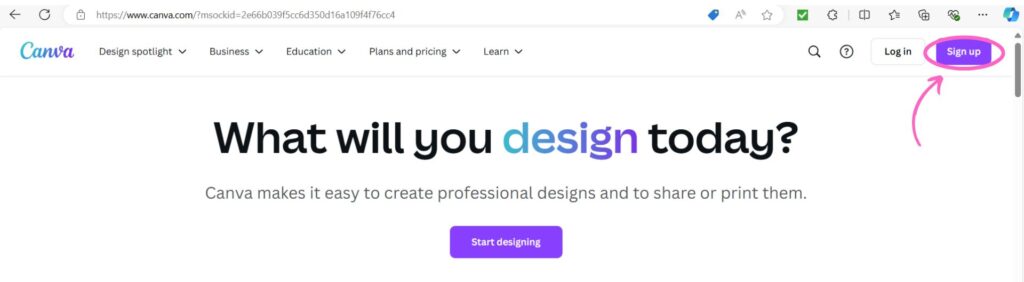
STEP 1
Go to www.canva.com (<<<< click the link to go to Canva!) You can use Canva on a phone, tablet, or laptop, but for the best experience I recommend using a laptop whenever possible.
STEP 2
In the top right corner, select the purple sign up button.
STEP 3
Choose from the options to sign up with Google, Facebook or your email.

STEP 4
Complete the onboarding process by answering Canva’s questions on how you plan to use the software.
That’s it — your Canva account is ready! Now you’re all set to load your purchased template.
2. Loading Your Template
STEP 1
Log into your Canva account.
STEP 2
Click on the template links provided in the “Start Here!” PDF you received after purchase.
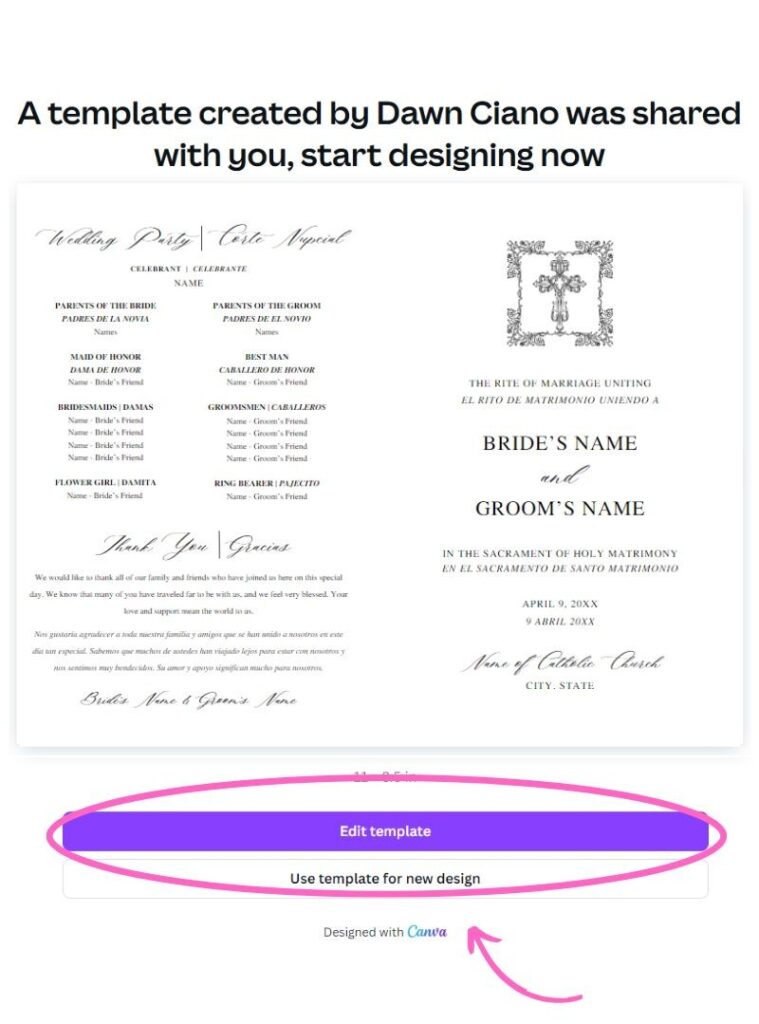
STEP 3
The links will take you to the screen you see on the left here.
STEP 4
Click the purple “Edit Template” button.
Your template will now open in Canva, ready for you to customize!
3. Exploring the Canva Dashboard
The Canva dashboard is your main workspace, where you’ll edit and customize all of your template files:
1. Menu Bar: Located at the very top. Access features like Undo/Redo and Share. You can also rename your file and check the saving status (Canva automatically saves your work).
2. Tool Bar: Use the Tool Bar to customize your text — fonts, sizes, colors, alignment, and more. This will change depending on whether you are editing text or a graphic.
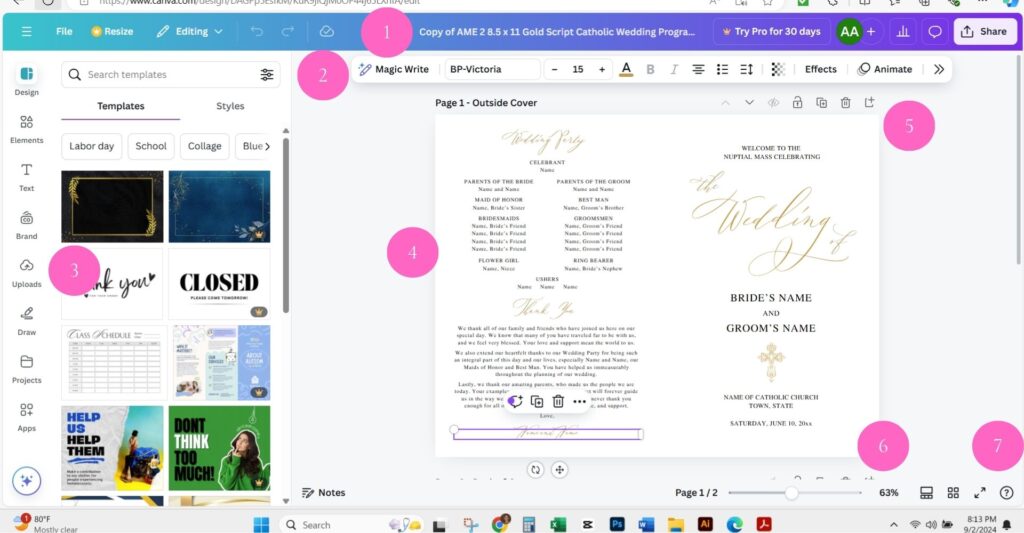
3. Side Panel: Your editing toolbox. The most important tabs include:
- Uploads: Add your own artwork or photos.
- Elements: Access shapes, frames, illustrations, and design accents from Canva’s huge library.
- Text: Add new text boxes and explore Canva’s font library.
- Folders: Store and organize your Canva projects and assets.
- More: Explore Canva add-ons and integrations.
4. Workspace: The main canvas where you edit your design.
5. Pages: Add, duplicate, or delete pages. Drag them up or down to reorder.
6. Zoom: Adjust the viewing size of your design.
7. Help section: Access Canva tips, tutorials, and support.
4. Working with Layers
WHAT ARE LAYERS?
In Canva, like other graphic design software, layers allows you to organize the stacking order of different elements, like text and artwork, inside your design. By using the layers, you can edit specific parts of a design without affecting the rest of the design.
WHERE DO YOU FIND LAYERS?
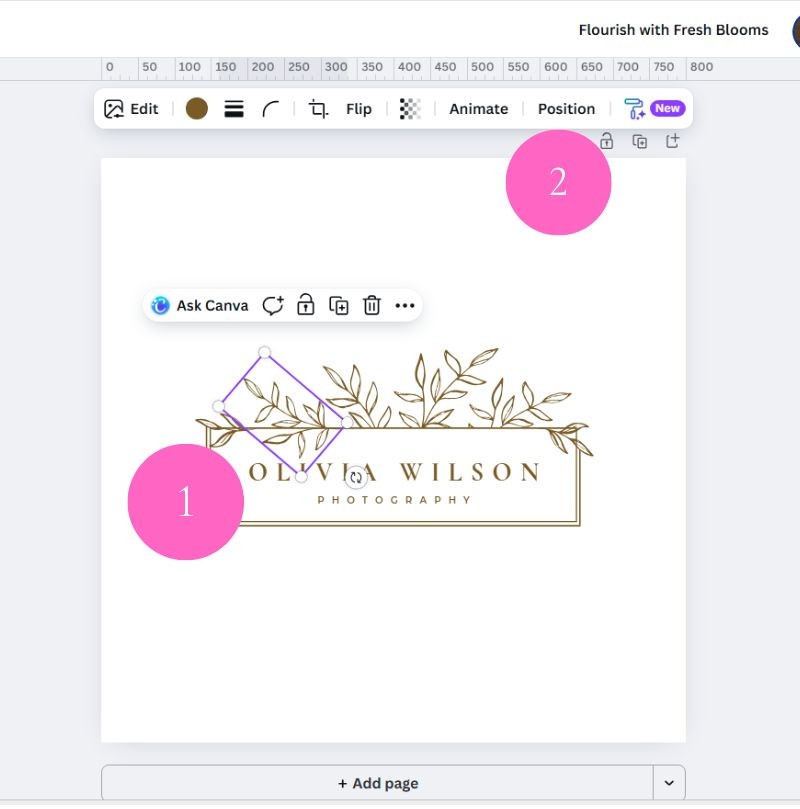
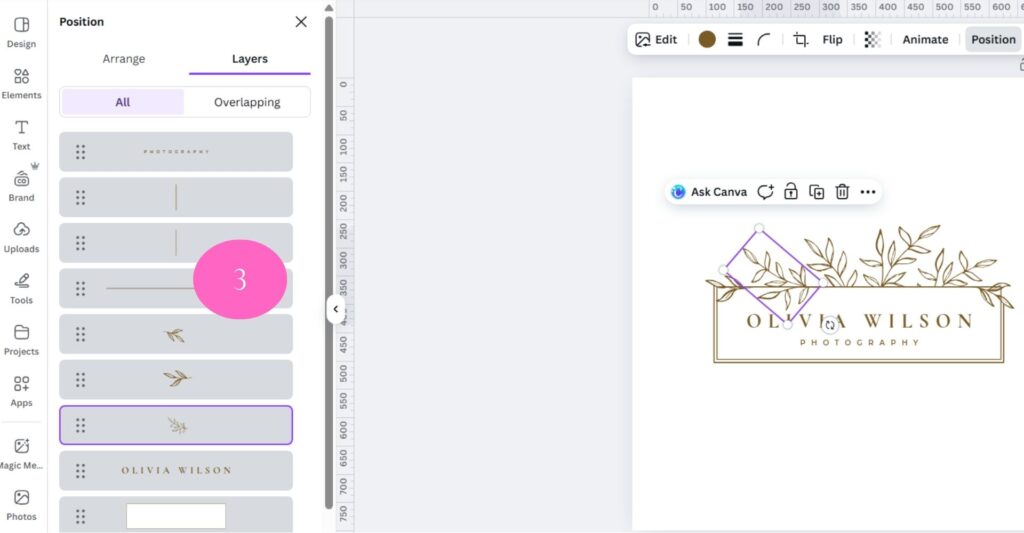
To open the Layers panel, click on any object in your design (No. 1). In this example, I am clicking on the leafy branch to move it below the white rectangle. You will see a toolbar appear above. Click on the word “Position” (No. 2). You will see the Layers panel open on the left (No. 3).
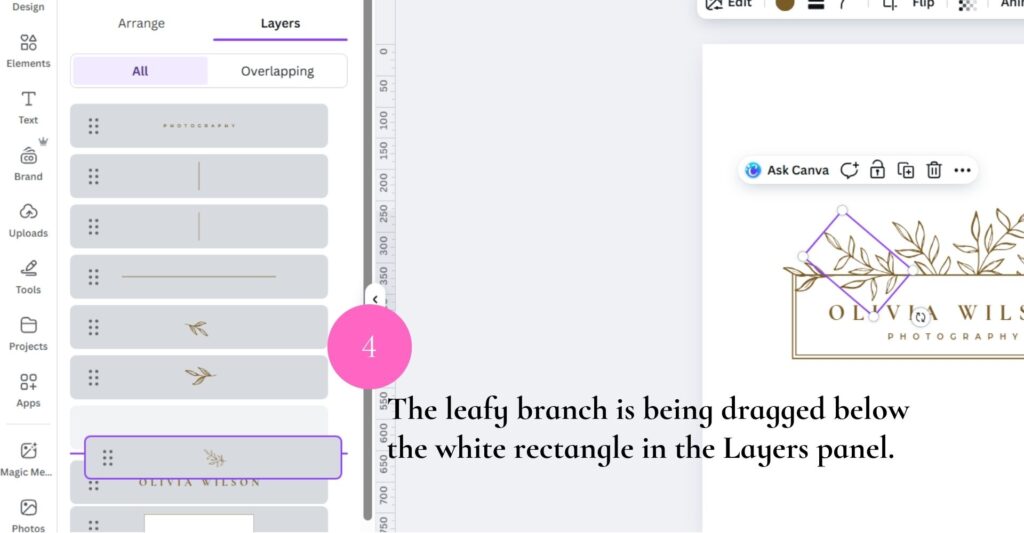
4. Click on the item in the Layers panel and drag it up or down (No. 4).
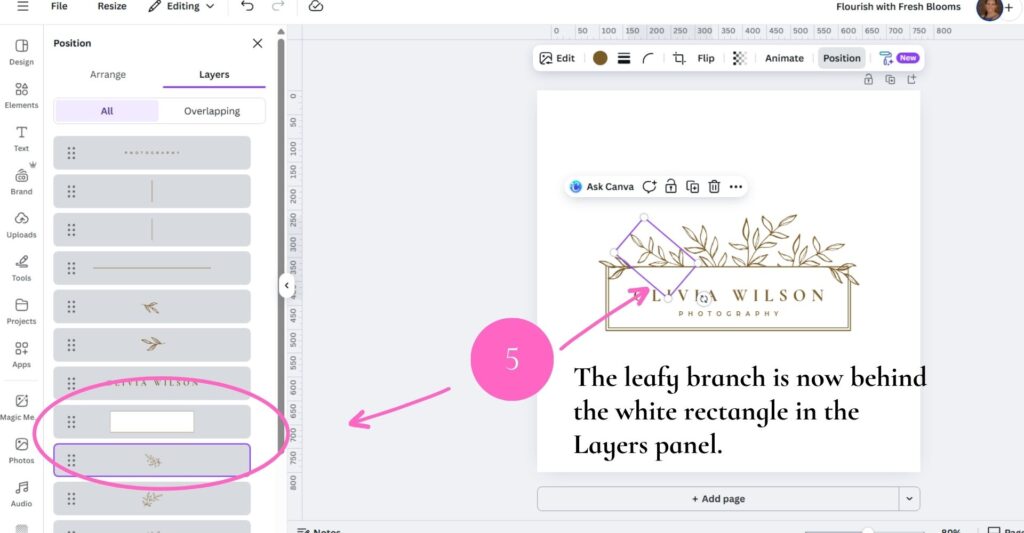
5. The leafy branch has been moved below the white rectangle. (No. 5)
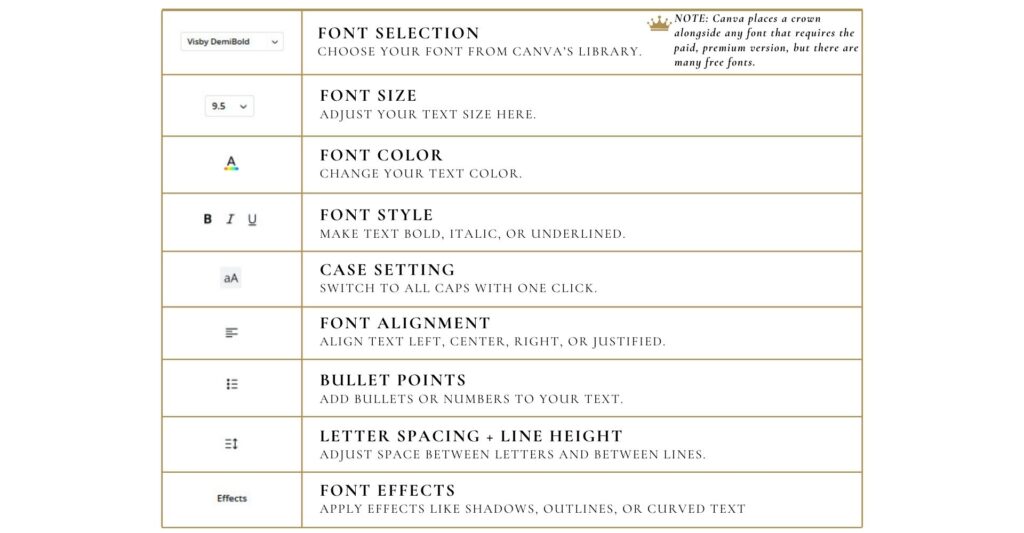
5. Editing Text
Editing text in Canva is simple and intuitive. This cheatsheet gives you a quick overview of the main tools you’ll use to adjust fonts, colors, sizes, spacing, and effects.
6. Adding Photos
UPLOADING PHOTOS
Uploading your own images to Canva is easy.
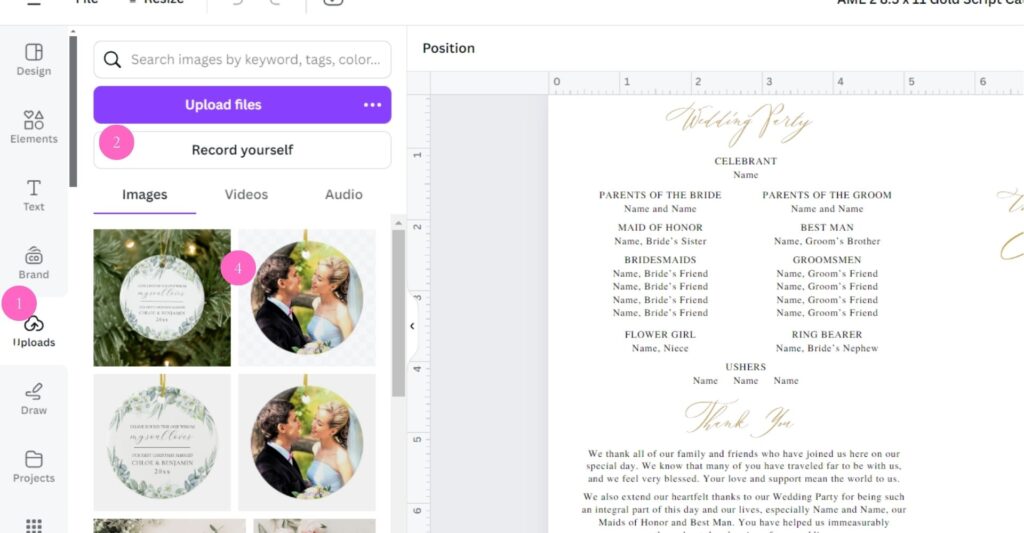
STEP 1. On the left hand toolbar, click “Uploads”.
STEP 2. Then click “Upload Files”.
STEP 3. Locate the file you want to upload on your computer, tablet or phone and upload it. Select the photo from your computer, tablet, or phone and click ‘Open’ to upload.
STEP 4. The photo now appears under the “Images” tab. Click the photo to add it to the document in your workspace.
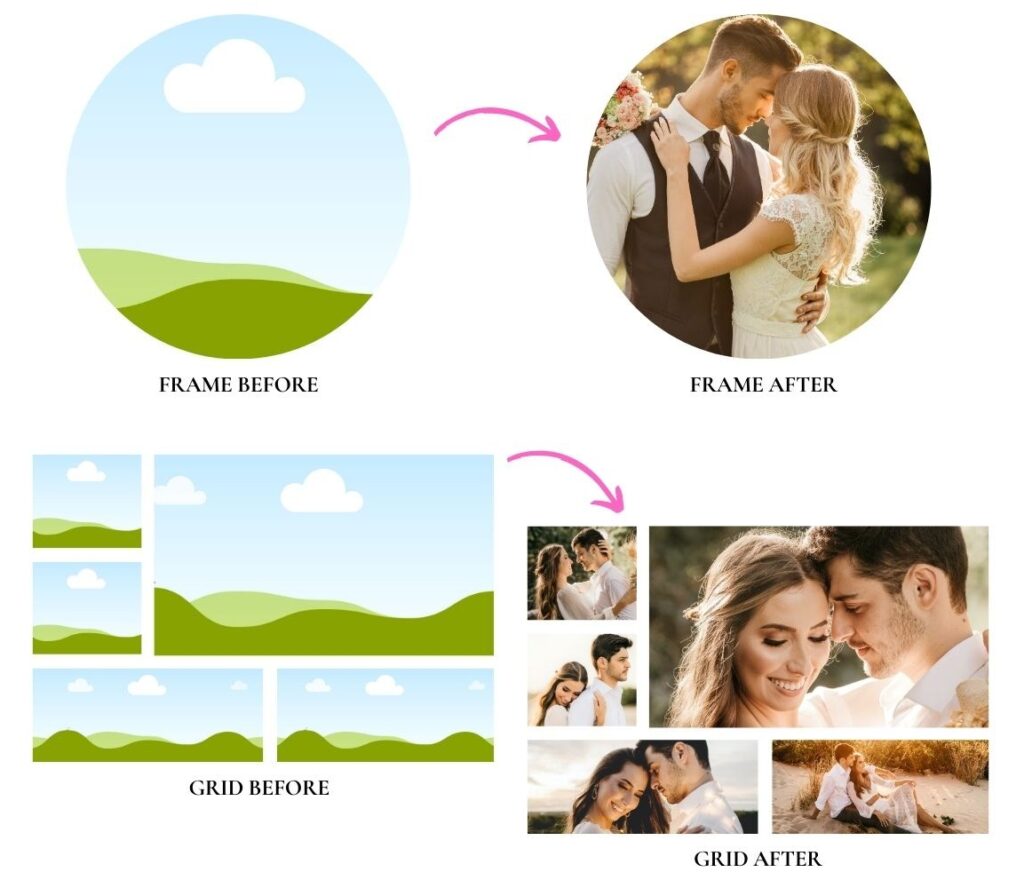
USING CANVA’ S FRAMES AND GRIDS
If you decide to add additional photos to your document, Canva’s Photo Frames and Grids are amazing tools that help you to neatly lay them out. Frames are best for adding one photo, while Grids are best for adding multiple photos.
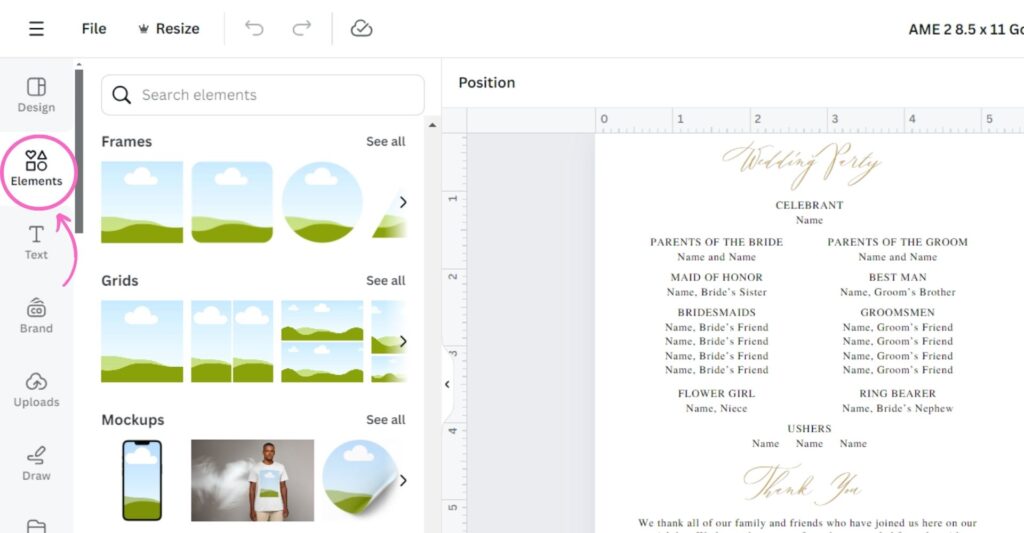
WHERE TO FIND FRAMES AND GRIDS
Go to the toolbar on the left side of you screen and click “Elements”. Then scroll down until you see Frames and Grids. Drag and drop a Frame or Grid onto your workspace.
DRAGGING YOUR PHOTOS ONTO FRAMES AND GRIDS
Once your Frame or Grid is in place, drag your uploaded photos over them and watch them transform into something like this:
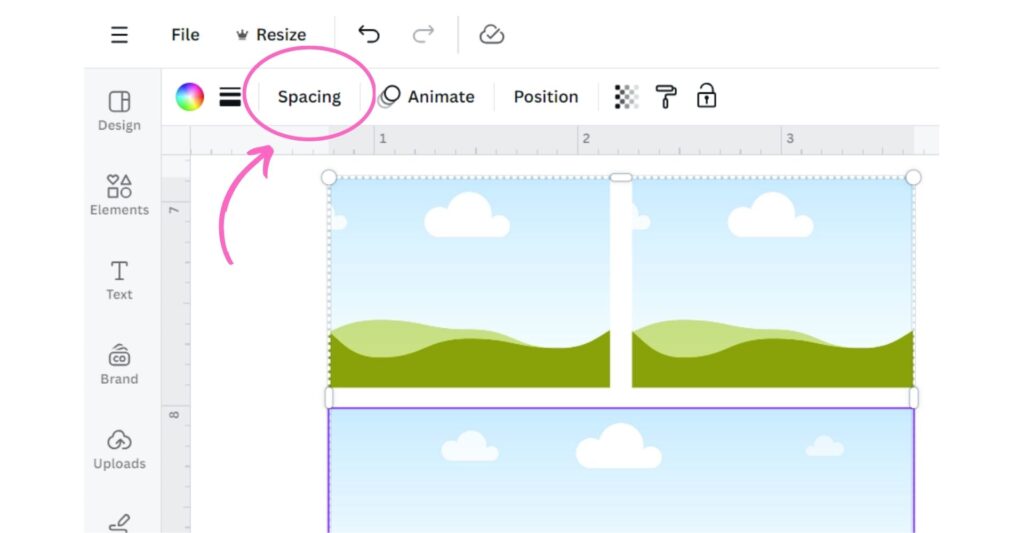
QUICK TIP FOR SPACING BETWEEN FRAMES AND GRIDS
Adjust the spacing on your grid by clicking the grid and then clicking “Spacing” from the top toolbar.
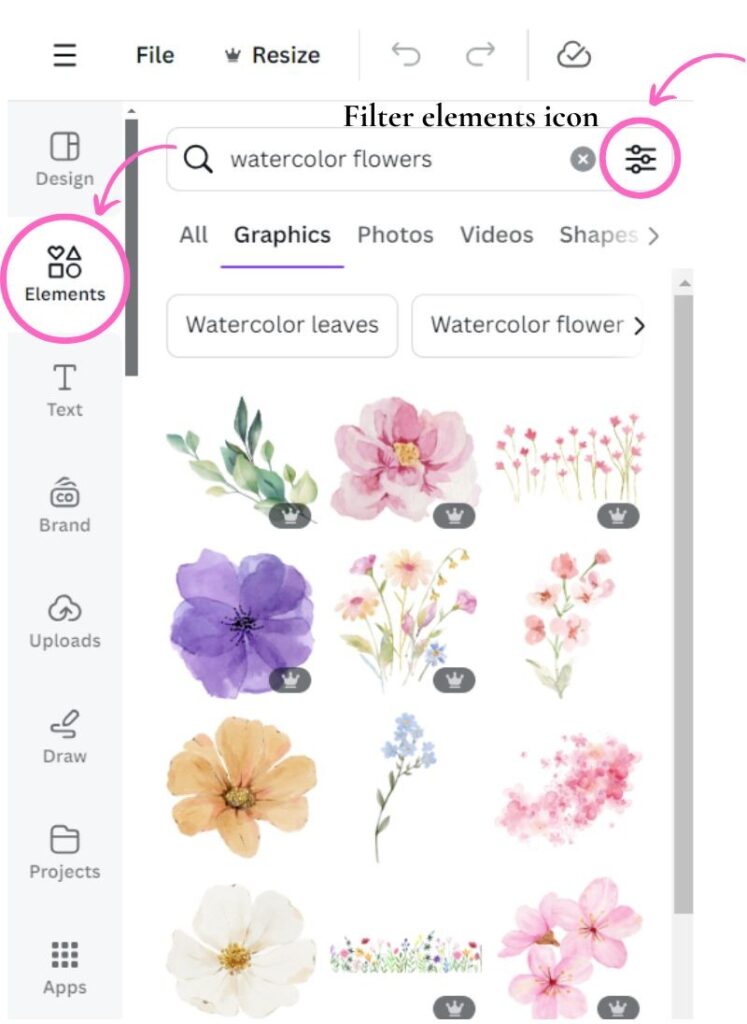
7. ADDING ELEMENTS
Canva comes with a huge library of free and paid graphics/artwork found under “Elements” in the side toolbar. Try searching for a term like “watercolor flowers” in the Elements search bar.
If you see a crown next to an element, it means that you need to pay to use that element. To filter for Free elements, click the filter icon to the right of the Elements search bar, scroll down and click “Free” under the “Price” filter. If you have the budget, consider paying for some premium elements. The selection is much larger and there are so many beautiful ones!
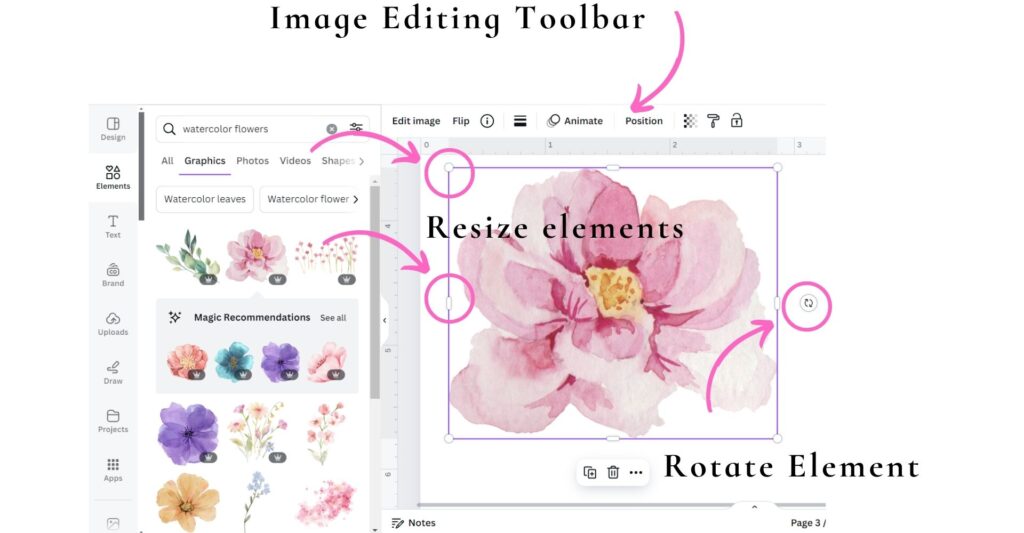
Once you find an element you like, click it to add it to your design workspace. If you click the element once it is in your workspace, a toolbar will appear that lets you edit it, flip it, change the color, and position it. You will also notice that there is a purple bounding box around your element. Pull on the white circles and lines to resize it. Rotate the element by clicking and dragging on the rotate icon seen above.
8. MANAGING pAGES
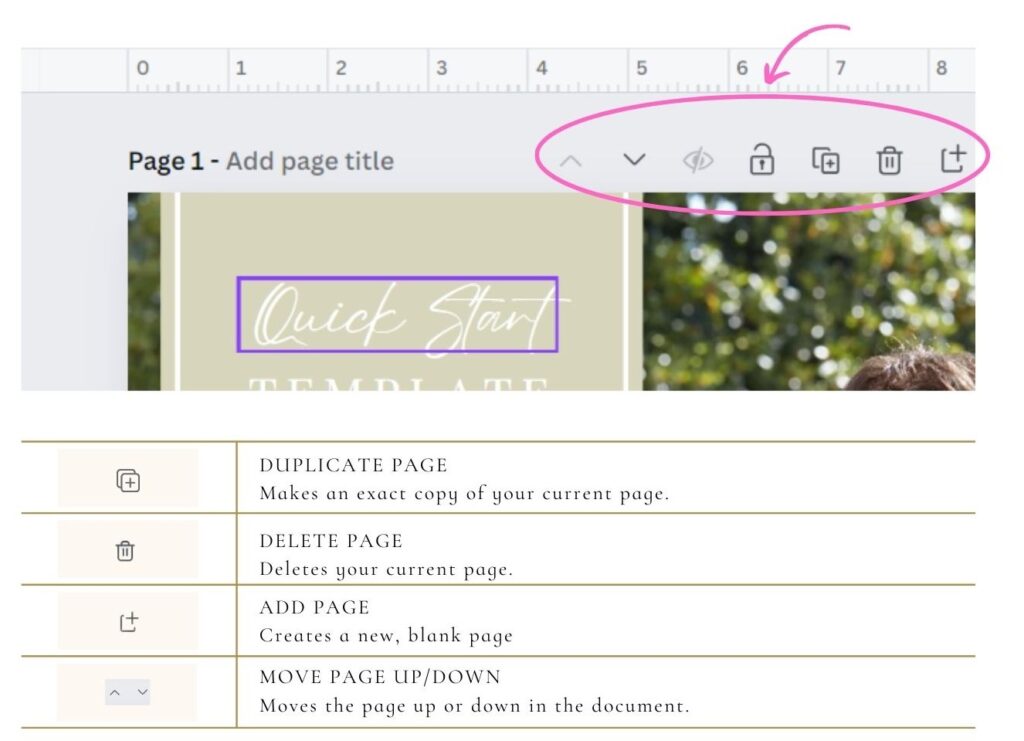
ADDING AND DUPLICATING PAGES
You can easily add and duplicate pages on Canva using the Duplicate and Add Pages menu on the top right of the workspace.
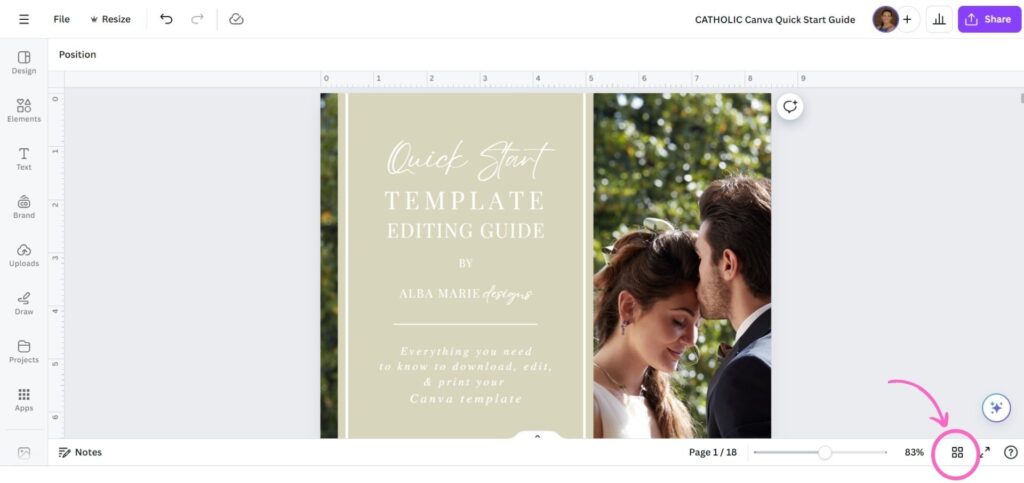
GRID VIEW
Grid View allows you to look at multiple pages in your document at once. It is an excellent way to find a page quickly if there are many in your document. To access Grid View click on the icon in the bottom right corner of the workspace.
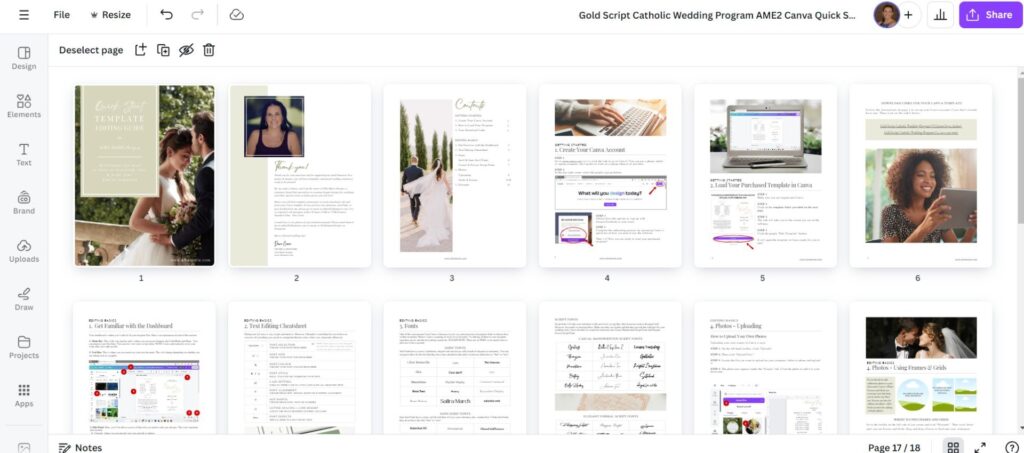
When Grid View opens, you will see all your pages like the following. To rearrange the pages, drag and drop them into a new order.
9. Video Tutorials
Sometimes a video is worth a thousand words, and this is definitely true when using graphic design software like Canva. Below are a series of videos that cover most of the essentials that I have shown you in this guide. You can review them to quickly learn how to edit and print your template and then use the rest of this guide as a quick reference to refer back to without having to scroll through a video.


I hope this tutorial has been helpful for you. Please let me know if you have any questions in the comments or by reaching out to me.